I agonized for days over what kind (water or oil-based) and color of finish to use on the wormy chestnut countertops. I made a lot of samples with extra wood.
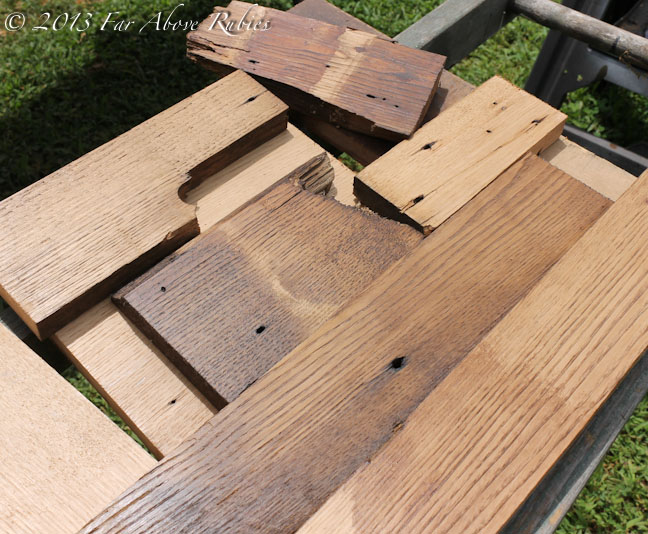
Remember I wanted light white marble countertops to begin with but going with wood, I knew would have to compromise on the color.

I tried a variety of different oil-based and water-based stains in medium and dark tones. I also tried a whitewash, upper right, and although I liked it, a lot, it looked too 1991 and “beachy” for me.

I really wanted that old store well-worn counter look so I decided to go with a medium tone walnut rubbing stain.

Let me add here that I was not terribly concerned about having a food-safe surface. I never, ever put food on the counters…I just never have. I use a big marble board for that and have wooden cutting boards for shopping veggies/fruits, and since this counter will be where the sink sits, I was more concerned about durability. I also had no desire for an oiled finish. I wanted to preserve this rare wood and once you oil, you can’t get it out, so that was never an option. If I decide to take this out and make a table out of it later, I can.
First, though, I prepared the wood for staining by using the hand planer then the electric planer in a couple spots to get everything perfectly smooth and even.

I sanded starting with the electric sander using 60 grit sandpaper, then changed to a sanding block and moved up to 100, 150 then 220. I used a small piece of 2 x 4 to wrap the paper around so the surface was hard and easy to maneuver. I always sand in the same direction as the grain of the wood.

I filled any holes that went all the way through with walnut-colored wood putty because I wanted to retain the dark color around the old nail holes that are so much a part of the character. Let me add that I only used wood filler in some of the old nail holes and not in any of the joints as we worked really hard making sure all the joints fit perfectly. I do not ever recommend using wood filler to disguise poorly fitting joints as it will crack and will make a wood project look bad.

Then I started with the first coat of stain. This rubbing stain dries quickly, so you have to work fast in order not to get streaks.

The first coat came out really well, and not too dark.
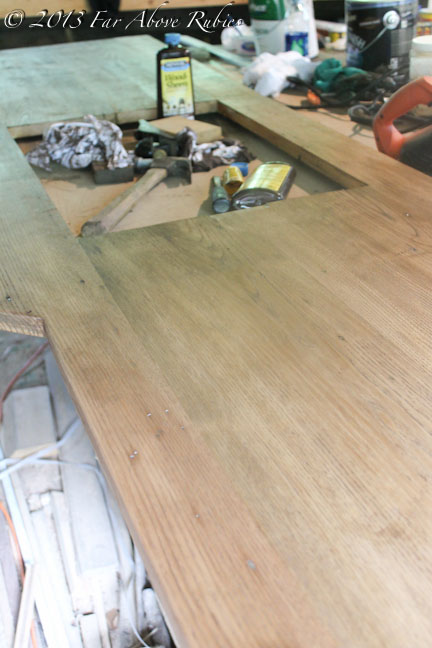
However, water-based products will really raise the grain of the wood so after it dried, I hand sanded again and put the next coat on.
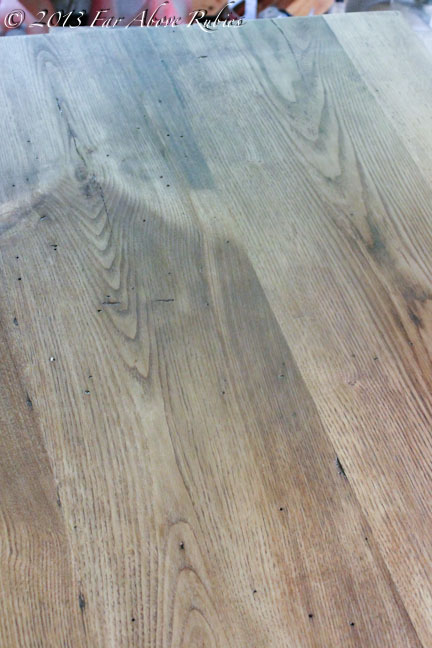
But, the second coat had some streaks in it so I let it dry for about an hour (should have waited longer) then started to sand it back off. I just about cried at this point, but I left it alone for a couple more hours.

I then came back and sanded with 60 grit, 100, 150 and 220 all over again. I, of course, wiped away the sanding dust with a damp cloth.

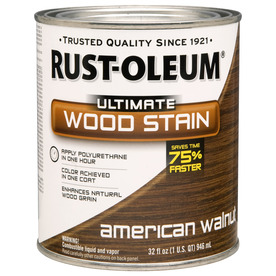
Then, I brushed on Rustoleum Ultimate Wood Stain in American Walnut. This gave me exactly what I wanted–the old country store counter.

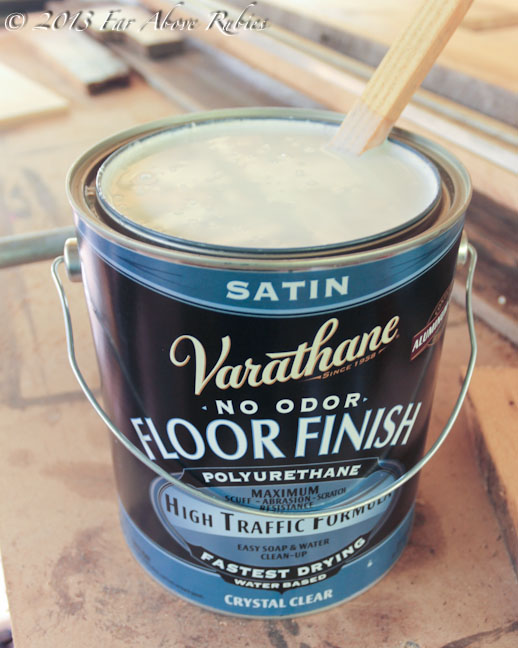
After that dried an hour or so, I sanded lightly again then applied the first coat of polyurethane with a brush. I chose this for durability and chose the satin finish because I didn’t want it too shiny. It will be shinier than I want anyway. I LOVE this particular poly. It goes on really smoothly, and after four coats, there is not a bubble anywhere.
I sanded lightly only after the first and second coat.
I just had to bring it in the house for a peek:-) It’s hard to see with the halogen lighting, but it is the perfect color to tie in the dark trim from the old house and the grey lower cabinets.

Hopefully, the sink will be here tomorrow and we can cut the hole, then maybe get it in this week. We have several musical projects going this week also, so I’m not sure how much we will get done.
The sink saga continues as the company I bought the damaged one from has been very slow communicating with me about a return. They ended up trying to send me the right one and told me to keep the old one, but I don’t want either one as the quality is just not what I thought it would be, and I haven’t heard from them since Wednesday. So I could have three kitchen sinks. Yay. Craigslist here I come.
You can see Part IV and links to the other steps in this process starting HERE.
Anita
I’ll be joining:


u r a trooper!
Absolutely gorgeous. You two are so dedicated to a job when you begin it.
Those counters will look fabulous and mean so much so the wood is from the old home place.
Congrats on a job well done!
It looks fantastic! I love the color and it came out so nice. A lot of work but so worth it 🙂
You're nearly done, and it's looking WONDERFUL!
I love it!!
Gorgeous Anita! Cant wait to see the sink too.
AMAZING idea they will look awesome. We have used both those products and they are excellent. WOW what a neat idea Anita.
I think it is so hard to get the look of stain just right, but I think you nailed it – just a little construction humor:) I've enjoyed seeing the whole process.
Anita, gorgeous. And I love the color.
I have built my own 16' 10" + 24" for a side cabinet butcher block countertop and have been debating over colors.
I wanted to share this with you. If that surface is EVER pierced by a knife cutting something, something pointy dropped, whatever, the poly seal is broken. Water can get under that easily (Water is sneaky) and it'll mold black.
Since you don't cook ON your counters (I don't either) think about this:
Finish staining as you have. It's very, very smart to have gone different grains and between coats. A PIA, but a better product.
Then, if you must use poly, rub it on with a cloth. Any poly. I prefer polyacrylic because it cleans up with water. But this will take out the shiney almost completely. You can skip the poly step and go straight to the next with great results.
My next step is always some kind of wax. About 3 coats. Stores and people before spray "polishes" waxed furniture year after year. It became deep and rich. I opt for any paste wax at the moment. I have some Minwax, but have use Bowling Alley wax, the ASCP and CeCe Caldwell (latter way to much $$ for clear!!) Then buff. It's water proof and just glows.
You have put an incredible amount of thought and care into creating those gorgeous counters. I hate to see anyone poly something where Water lurks.
Enjoy!!
Hi Christine, and thank so much for your insight and info:-) I did put a lot of thought into the finish, and based my decision largely on a dining table I made about 9 years ago. It gets lots of wear, spills, kids painting, and any projects we are working on including sewing and scissors. I have never had an issue with water getting under the finish. I had a crock with a slow leak sitting on the table on top of a fabric runner for about a week and even where there was no finish, it did not hurt the wood underneath. I do know you have to be careful and have been so having had laminate in this house. I did read an article on wood countertops at "American Hardwood Information Center" and they recommend using poly when no cutting will be done. I really do appreciate you sharing that info and I will be careful to make sure water doesn't ruin the wood:-) hardwoodinfo.com/articles/view/admirer/7/210
That's great news! Your counter is so pretty & unique! I'm going to be stalking, er, following your progress avidly!
Anita, the wood stain is gorgeous! You just have such a great eye (and talent) for making things beautiful! I can't wait to see it with the new sink!
Oh Anita, the stain is bEAUTIFUL! I am partial to that color stain, all my floors and woodwork at the old house were Special Walnut:) Can't wait to see the sink! XO, Pinky
Anita wow, you are so talented, your counter tops look amazing! I love wlanut and Wood in general. Have a lovely week.
FABBY
Hi Anita! Honey, you're amazing! I love the pretty counter top and the stain is so rich looking! Now I can't wait to see your pretty sink.
Be a sweetie,
Shelia 😉
Happy Tuesday Anita. I've been watching and waiting for a reveal. It looks amazing so far. I love the you are going for an old country store counter type top. AGAIN, you like EXACTLY what I like. No wonder I come to your blog many times throughout my week. I still have more to discover in your previous posts but work is calling me today so I'll be back tonight, after work, to enjoy more of your talent and beauty.
~ Lisa from Indiana ~
Oh wow, the counter looks amazing. What a great job. Love the color stain too. Thanks for all the tips. Thanks tons for linking to Inspire Me. Hugs, Marty
Your countertop looks pretty amazing Anita! I love the finish. I'm hoping to have to refer to your countertops in the near future.