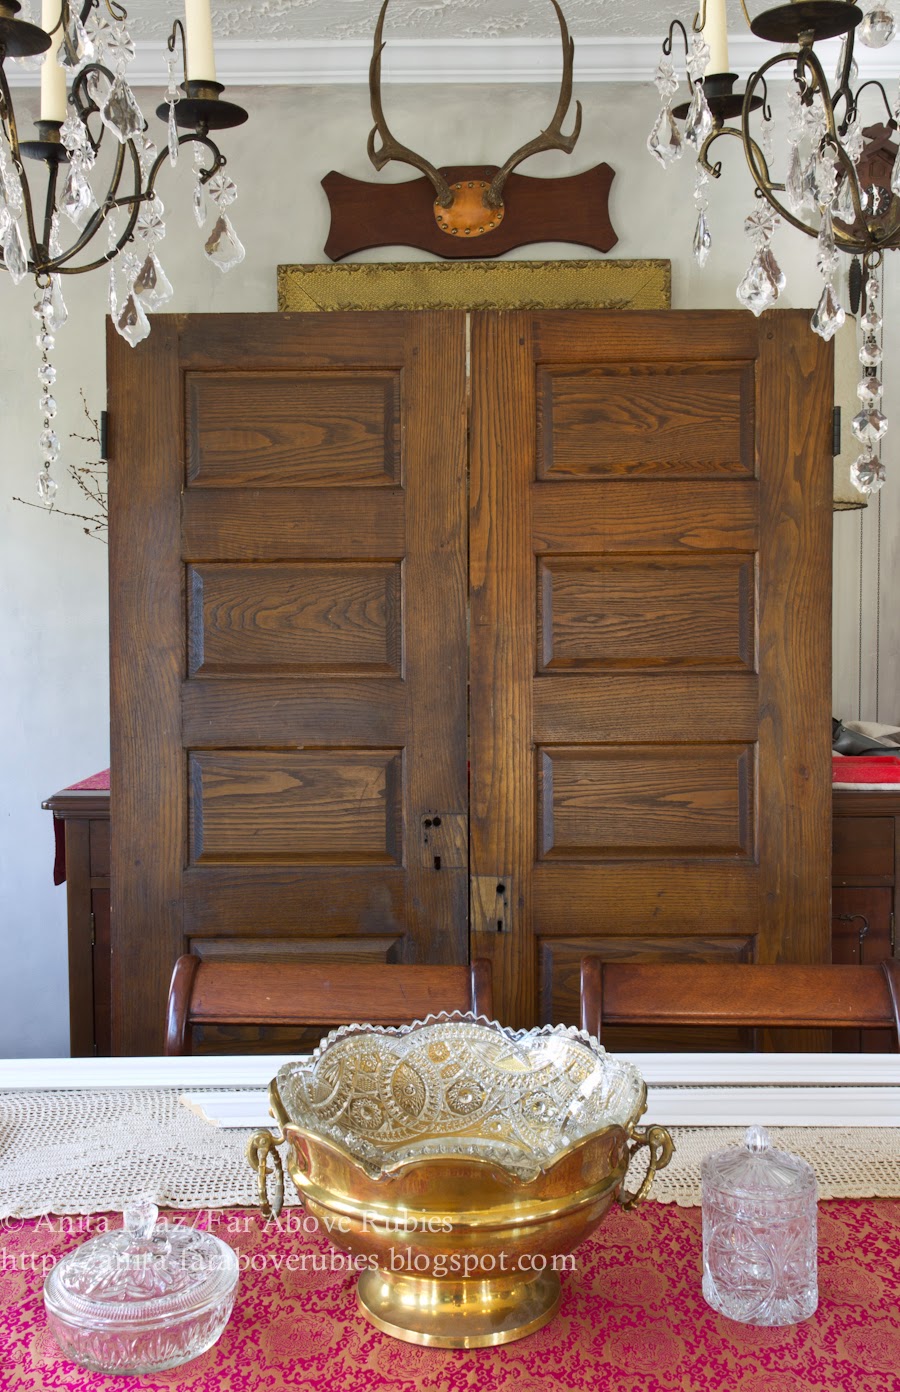
Like I said last week, the smallest projects always turn into something bigger and this has been no exception. It all started with taking out the corner bathtub in the master bath and replacing it with a closet. I was determined to build it around these antique doors from my grandparent’s house.

My husband knows that whenever I find something old to work around, it is not going to be square and it will have bows and curves where it shouldn’t. He suggested using some new doors. Ha! Can you believe it? But being the patient and meticulous person he is, he got to work shaping them up and getting them ready to hang.

We then pulled the bathtub out, and he repaired the plumbing and sub-flooring. That left me with a big hole that needed to be patched. At that point, I was actually glad to have peel and stick vinyl tiles thinking I could just go to Lowes and get more tile.
Then I found they don’t make that particular color any more. Really?
My first problem was trying to figure out what to do without replacing the whole floor. The thought of buying enough vinyl tile for the whole bath, then putting it down was nauseating, and I just couldn’t see spending more money on vinyl when I’d really like to have ceramic tile or marble… someday in the far distant future.

So I thought and thought some more and finally realized that slate floors actually have a lot of variety in color, so I went back to Lowes and bought several slate-type tiles in different colors. I wanted a pattern, but somewhat random like this with light, dark and medium…

…but with no grout lines like this one. There is actually a grout product for vinyl tiles, but since I was only replacing some and not all, I had to stick with no grout since that’s how I originally put them down.

I played around with a pattern trying to mix them up, and started to wish I had paid more attention in math class. I tried 500 several different patterns.

And ended up with this. I was able to just cut out the tiles I needed to move around to another spot and replace with the new tiles. However, problem 2 arose when I realized the original tiles I had cut out, which were laid on top of an old vinyl floor, were thicker than the new ones. To solve that problem, I bought a 2′ x 12′ section of cheap vinyl flooring and cut that to go under each of the new tiles as they were placed on the floor. I attached the vinyl first with vinyl floor adhesive, then laid the new tiles on top and that gave me the thickness needed for all of the tiles to match.

It was a horrible process.
Luis helped me cut the tiles with a utility knife, and we got some pretty tight joints.
It was honestly the only thing we could do quickly and without much expense, and in the end looks fine and will certainly do for now.

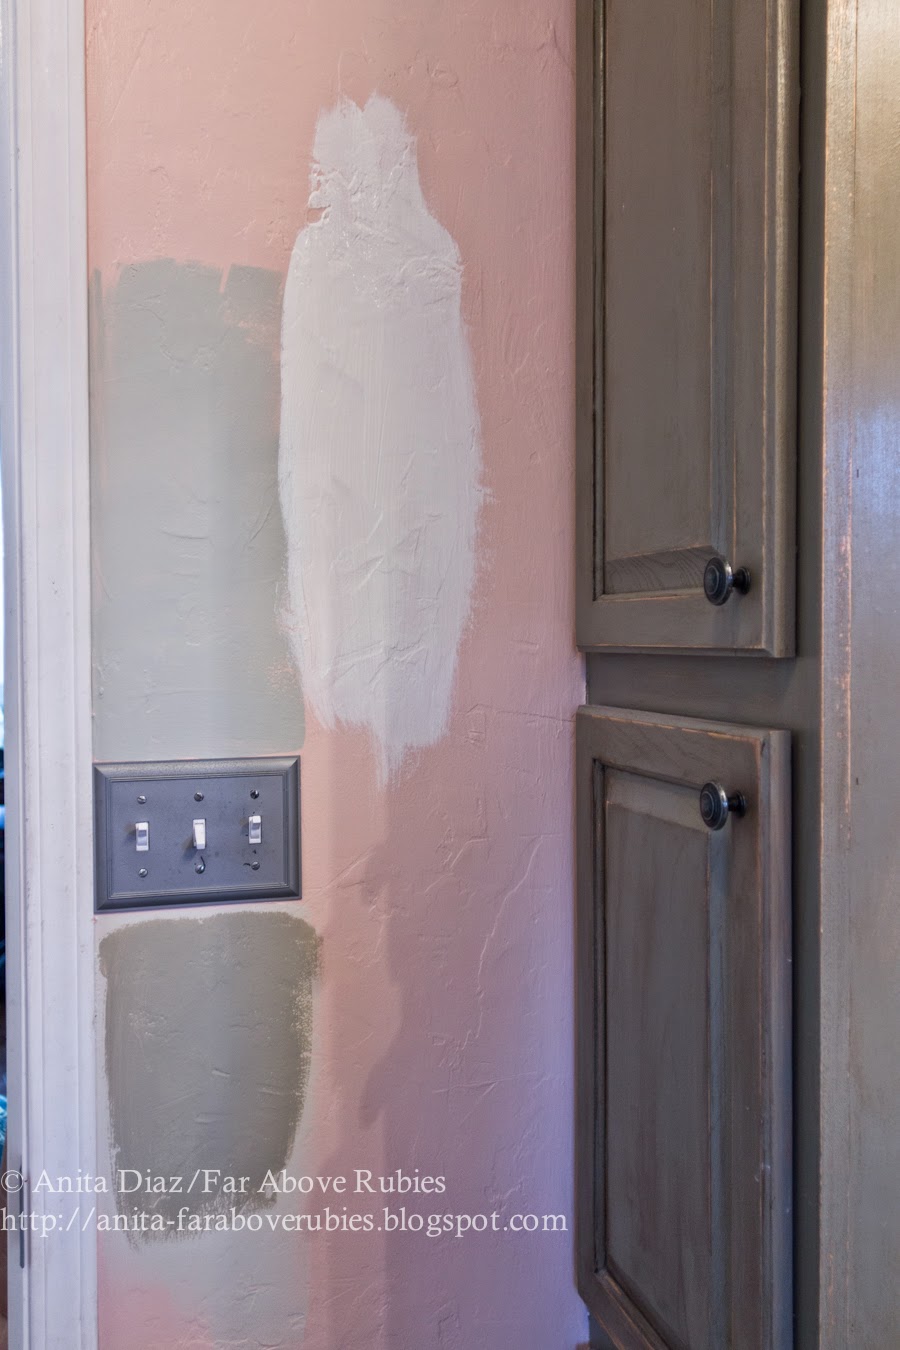
After figuring out the floor, I really thought the pink walls should go. Even though I love the color, Luis was not crazy about it, so I decided to go with a lighter version of the grey that is on the cabinets. Despite my past luck with picking paint colors, this time was a miserable fail. The color I bought looked like neon mint green on the walls. So we went back to Lowes, then Walmart, and I chose two colors: Eddie Bauer “Limestone” and BHG “Sunlit White.”

I still could not go with either of those and really didn’t want to make another trip to town for paint.

So I did what any gambling adventurous DIYer would do. I mixed “Limestone” and “Sunlit White” together and somehow came up with the perfect lighter grey to work in a room with the light mine has.

I did a little happy dance, then started painting.

Of course finishing the painting meant Luis could start framing the closet.

That part went really quickly and we were able to hang the doors and get everything primed and painted. I found some of my grandfather’s antique handles I was determined to use, and finally seeing them on the old doors, makes the process really satisfying. Here is a little peek:

As I said last week, the small projects turn into the biggest — especially when your budget is low and your taste is expensive. It took several days to straighten out the floor and paint color situation, but despite the setbacks, I could not be happier with how the room is shaping up. Having the closet is going to be amazing, and adding yet more things from the old house makes me smile.
It’s the little things:-)
We are still finishing up crown molding, etc., and I still have to distress and wax the closet, as we built it out of wood since it joins the cabinetry. I am also hoping to hang two vintage porcelain light fixtures with Edison-style bulbs, but I ‘m honestly not sure about that yet. We are replacing the countertop with wood, but have not found the right wood yet. We need something to match the grain of the oak doors and the wormy chestnut trim in the room.
In the end the enjoyment is not only in the process, but also knowing that we are reusing, reclaiming and recycling as much as possible:-)
Thanks for stopping by!!

I’ll be joining:


I hate when that happens. You run to Lowe's to find something you like is no more!! The floor now has an awesome custom look,
When we removed the builder special cabinet in the master bath to replace with a French dresser, we were nor c9nsideringbthectilexwas mot under the origins vanity. Aaaargh… Lowe's had discontinued it. abut we luv=cked out as my Mom had some extra. Saved!!
Awaiting the completed reveal.
Hugs, Gee
What a process. I can sense your frustration. Most projects don't go smoothly and I am always surprised when they do. I love how you fixed the tile situation – very ingenious. Your old doors and hardware are truly beautiful and I'm anxious to see the finished room. Some projects are bears to get through, but mean all the more when they are finally finished.
Cindy
This is going to be beautiful!
Oh my goodness, this is going to be fabulous. I can't wait to see it all done. Those doors are amazing.
Looks great!! Really love the color that you got after you mixed the two!! The floor looks great!! It was worth the 500-er, the many patterns!! Haha!! Love your home and all you do!!
I love it!!!!
Speaking from experience, trial and error sometimes has better results than the original plans. The floor and the paint are simply beautiful!
Can't wait to see the finished room. Looks great so far!
Those doors and handles are so neat, just love your new closet!
I love what you did with your floor! Shows true design and creativity! Can't wait to see the final look!
Oh, for heaven's sake!!! That really turned into a HUGE project-and-a-half!!! It would have been my Waterloo, but you guys just took it in stride and saw it through. You have a lot of backbone, lady!!! 🙂 VERY creative to work out a new floor plan that will work for you and look good! It's as if that's what you had in mind all along! The wall color is great, too!
It's wonderful that your husband knows how to do a lot of around-the-house stuff. That REALLY helps to cut costs so that you can do a little more than you otherwise could. We always have to call "the guy" for everything. 🙁
I'm really excited to see the finished room! Have fun with it!!!
Those doors are so beautiful! I can see why you were set on using them. Can I ask how well your peal and stick tiles have held up in the bathroom? I've been dying to put some down in ours as a temporary floor, but the Mister is convinced they will ruin super quickly with the water.
Hi Abby, the only issue we have had is them "moving" apart in a couple places a bit, but not enough to make a difference…not even 1/16". We have had no issues where we have water, like right outside the shower. Were I doing this kind again, though, I would use the vinyl grout which should take care of the slipping issue and they could be further apart. They just need to be super tight joints to avoid that.
Also Abby, they have been down for 6 years…
Oh wow! Anita that is quite an undertaking but I have no doubt that it's going to look amazing. Can't wait to see the final result! 🙂
Vanessa
Looks like a great start to the bathroom. I love those doors. Visiting you from Between Naps on the Porch.